Showing posts with label miters. Show all posts

Monday, April 22, 2013

oh, for the love of a good 45 degree angle...

I love the look of clean crisp mitered corners.  It just evens out a quilt, as opposed to having overlapping or log-cabin style corners which sometimes seem lopsided.  And while they're indubitably obvious to some, here's a little method I cooked up to get some nice sharp miters which is not hard at all.

Here we go!

Miters (of extreme awesome):

1.  Start with cutting the strips of fabric you'll be joining for your miter, so that there's lots of overlap.  There's no need to be wasteful, but having enough extra to reach the corners and then an inch or so to spare just makes things a little more stress-free.

2.  Attach your fabric to the quilt (or whatever you're making, I was making a quilt, so I'm just going to keep saying quilt, but miters could have lot of uses), right up to the corner.


3.  Line up the miter, make it look right.  It's not so important that it's a perfect 45 degree angle, as it is that it looks right.


4.  Crease or finger press it.  Because the lines may vary slightly once you actually sew it up, don't bother with ironing it now, you'll have to do that later.  (*Note: if you're using a fabric that's too thick or stiff to finger press, then you'll have to iron it, just know that your lines may move slightly and you'll have to iron out that crease when you give it a final press).


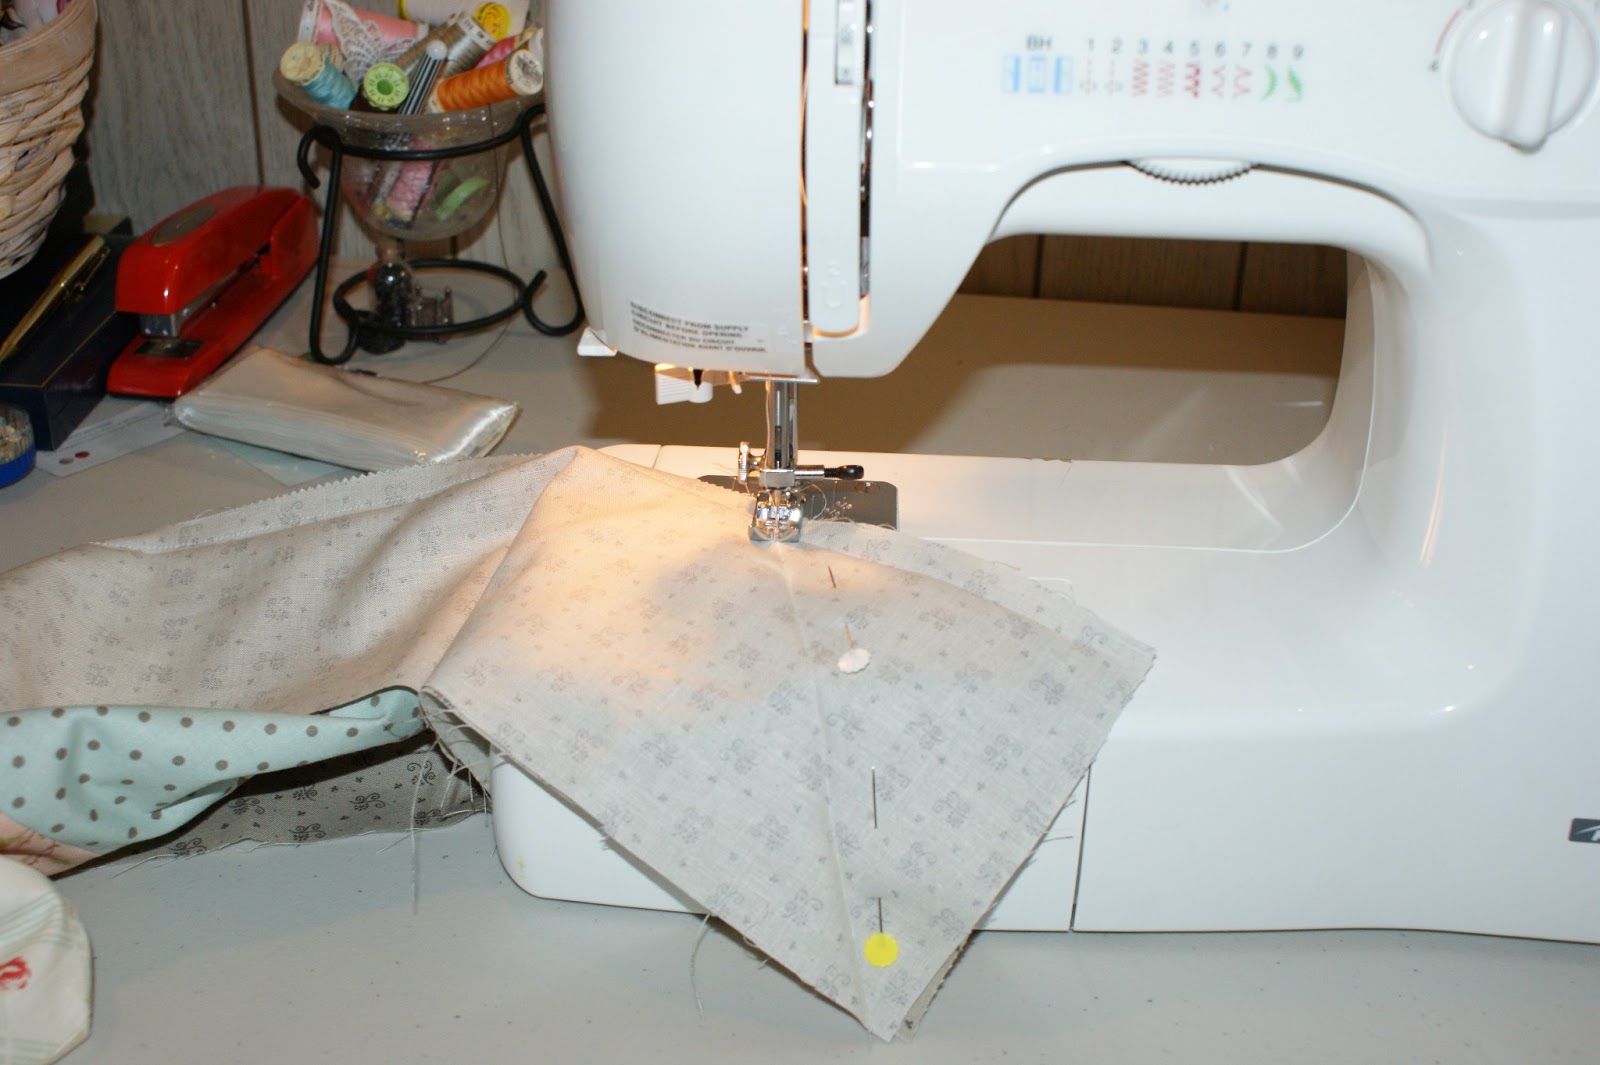
5.  Match up the right sides and pin so that the creases line up.


6.  Lay it so the crease lines up and lies flat.


7.  Time to sew!  Sew it along the crease you made.


8.  Now's the time for the proper press.  Iron it so the seams lay open if you're quilting it with a pattern (ie not along the seams)  otherwise, press the seams off to one side.


9.  Trim it all so it's not so bulky and...


10.  Love it!

    Et voila!  You have miters!  I hope that this can be useful.  I was pretty enthusiastic about it when I made mine up (which is something, miters aren't normally overly exciting things).  Also as a final note, because most projects have four or more miters, feel free to bring all four up to the finger pressing stage, and then take a step back to check that they're even.  That being said, I did mine one at a time and they turned out fine.

    Monday, April 15, 2013

    quilt-ly cuddles

    Long, long ago, I made a quilt top.  See, I had just loved the fabric and it was in a cute little layer cake for not a bad price at all and so I snatched it up and decided I'd make myself a lap quilt.  But, sewing for myself, especially when there's no specific deadline, makes for a project that quickly gets put of the very farthest back of burners.  Besides, I didn't even have anything to back it with yet.  Then, when perusing the local fabric store, I saw a baby quilt made from the same fabric line, and a little spark ignited.  My little Bean prefers to sleep with a quilt, so I thought I could make this for her.  At this point I have finally gotten around to buying some backing and a little extra to border it with, but, because it was just going to be an extra, even bringing it all on Christmas vacation with me didn't give me enough of a push to complete the project.


    Recently, I started knitting a baby blanket for a friend.  The pattern was simple enough, but the yarn was delicate and the needles were small, and after about a week of diligent evening knitting I noticed I had messed up the last five or so rows, so I gave up with that.  Feeling pretty close to failure I remembered my lovely quilt, all ready to get put together and quilted.

    I've tried machine quilting before.  It was a mess; I managed to have a nasty little gather at every join.  It was wretched.  I tried it anyways.  This time: success!

    Voila, a lovely, classy quilt.


    I bound it with satin blankie binding, which I find makes it more baby-ish and less adult; plus babies love the satiny texture.


    Also, I really loved how my mitered corners turned out.


    Bug decided that Dr Seus's ABCs was required in the quilt photos.


    And Bee, our cat of extreme fluffiness, also wanted in on the photography.  What a cozy little scene.

    I hope they have lots of fun playing on and snuggling in it.  I'm so glad it has a home.  I had even started to toy with other uses for a quilt topper, as I began to think it would never reach quilt-dom.

    10 other Uses For a Quilt Top:

    1) Table runner (just make sure you sew on a back).
    2) Line a basket (or cover a box).
    3) Cover a cork board, add a frame, and you have a pretty snazzy pin-board.
    4) Cut it into chunks, which you could frame and make a pretty interesting picture arrangement (or frame in embroidery hoops).
    5) Make a teddy bear.
    6) Tote bag.
    7) Christmas stocking.
    8) Hot water bottle cover (or rice bag cover).
    9) Oven gloves, or re-cover old oven gloves (depending on the material).
    10) Basically, it can be used as a regular piece of material that's just a bit fancier.

    However, like I said, this all started because I loved the fabric so much, so I'm glad I didn't have to resort to chopping it up for anything else.  It was meant to be a quilt and I'm really happy to have had it to give to my friend when I did.